Lemon Drizzle Cake

Image
Calling all lemon lovers.  This Lemon Drizzle Cake is the perfect bake for anyone who loves lemon in desserts or cakes.  This cake uses the whole lemon.  The zest is used in the cake and the lemon juice is used to make the lemon sugar syrup and the lemon icing.  You will definitely enjoy the lemon flavour right throughout the whole cake. A slice of this Lemon Drizzle Cake is lovely for afternoon tea or just because you love a slice of cake packed with lemon flavour.  It's so easy to make and the perfect cake to share with others without it being too sweet. Happy Baking xo Lemon Drizzle Cake Ingredients · 100 grams unsalted butter · 150 grams caster sugar · 150 grams self-raising flour · 2 eggs · 3 tablespoons milk · Zest of 2 lemons Lemon sugar syrup · 50 grams caster sugar · Juice of 2 lemons (reserve 1 tablespoon for icing) Lemon icing · 100 grams icing sugar · 1 tablespoon lemon juice  Instructions 1. Preheat oven to 180°C.  2. Grease and line a loa...

Coconut Ice

These cute pink and white squares of goodness are a classic favourite treat for most children in Australia.  I remember having them as a child.  I loved the colour of it and the coconut flavour.

Coconut ice is a no-bake treat which is super easy and fun to make.  They taste delicious with a sweet coconut flavour and you can't go wrong with a recipe that contains condensed milk.

These make a great homemade little gift for Christmas or someone's birthday.  I hope you give this recipe a try as it's so easy to make.

Happy Cooking xo

Coconut Ice

Ingredients

· 2 cups icing sugar
· ¼ teaspoon cream of tartar
· 395 grams can of condensed milk
· 3½ cups desiccated coconut
· Food colouring (deep pink – Americolor)

Instructions

1. Line a 15 x 27cm tin with baking paper.

2. Sift icing sugar and cream of tartar into a large bowl.

3. Add the condensed milk and desiccated coconut and mix well.

4. Divide mixture into two bowls. Add a few drops of food colouring to one bowl to create the pink layer of the coconut ice.

5. Place the white mixture into the tin and firmly press down until mixture is evenly spread out.

6. Place pink mixture on top and press firmly down.

7. Refrigerate for at least an hour before cutting into squares.

Tips

· I used a pair of disposal gloves to mix the pink food colouring into the mixture to avoid getting food dye on my fingers. It still works by mixing it with a wooden spoon.

Did you bake this recipe?

Remember to tag @youcanbakeittoo on Instagram & hashtag #youcanbakeittoo 
so I can see your wonderful bakes.

Follow Me on Instagram Follow Me on Pinterest

Comments

Popular posts from this blog

Coffee Kisses

Mini Yo-Yos (Melting Moments)

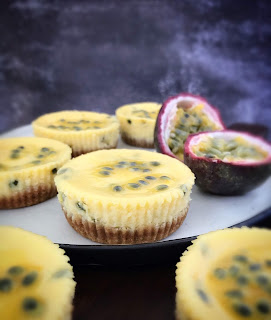
Mini Passionfruit Cheesecakes