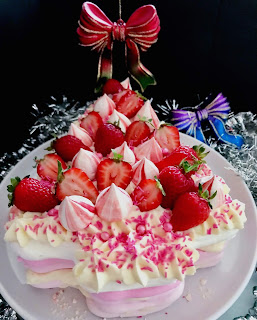
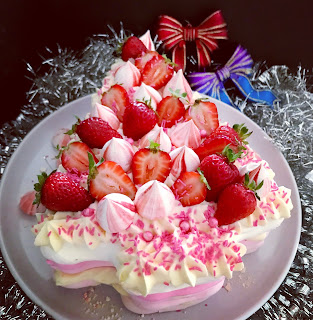
I have always wanted to make a pavlova and this was the perfect opportunity to do so. Not only is it Christmas but an Aussie Christmas always needs a pavlova.
I decided to enter the Queen's Fine Food's competition #QueenGoodEnough.
I saw a Pink Ombre Pavlova on their website and thought I needed to make one. Instead of it being a round pavlova, I decided to turn it into a Christmas Tree for the festive season.
This Pink Ombre Christmas Pavlova Tree is delicious. It's filled with whipped cream between each layer and topped with fresh strawberries and meringue kisses.
I had so much fun making this pavlova and it tasted amazing. I only wish that you could smell the strawberry and cream scent while the pavlova Christmas trees were baking. I just wanted to eat them. I would definitely recommend this delicious recipe and Queen's awesome products.
Happy Baking xo
All photographs posted here are mine, from my bake.
Below is the original recipe from the Queen Fine Food website or you can simply click the link.
https://queen.com.au/recipes/pretty-pink-pavlova/
Pink Ombre Christmas Pavlova Tree
Ingredients
Meringue
1 2/3 cup (370g) caster sugar
180g egg whites (approx 6 large egg whites)
3 tsp Queen Strawb'ry & Cream Flavour for icing
Queen Red Food Colour Gel
Decorate
600ml thickened cream
½ cup (75g) icing sugar
1 tsp Queen Madagascan Vanilla Bean Paste
2 tsp Strawb'ry & Cream Flavour for icing
Fresh strawberries
Method - Meringue
STEP 1
Preheat oven to 200ºC (fan forced). Place caster sugar on an oven tray lined with baking paper, spread thin and warm in oven for 5 minutes.
STEP 2
While sugar is heating, beat egg whites on medium speed until soft peaks form, approx. 1-2 minutes. Remove sugar from oven and while still mixing, fold sides of baking paper and add sugar gradually to egg whites. Beat on high for 5-10 minutes until mixture forms firm peaks and bowl of mixer cool to the touch. Add Strawb'ry & Cream Flavour for Icing, mixing to combine.
STEP 3
Reduce oven to 100ºC and divide meringue into 6 bowls. Add drops of Food Colour Gel to 4 bowls to reach desired red shades and leave 2 bowls white.
STEP 4
Trace 5 x 18-20cm diameter circles onto a tray lined with baking paper. Turn paper over and dollop meringue within circles. Bake for 40-50 minutes, or until meringue has dried and will lift from baking paper easily. Repeat with all meringue layers.
STEP 5
With the remaining bowl of meringue, paint stripes of red food colour gel into a piping bag and then spoon in meringue. Pipe meringue kisses and bake for 30 minutes.
Method - Decorate
STEP 1
When ready to serve, whip cream, icing sugar, Vanilla Bean Paste and Strawb'ry & Cream Flavour for Icing until medium peaks form and layer in between meringues. Add a top layer of cream and finish with strawberries & meringue kisses.
Recipe tips
– Separate your eggs while they are cold – Chilled eggs are far easier to separate as the whites are firmer.
– Bring your egg whites to room temperature (approx 30 mins) before whipping. Room temperature egg whites give more volume and better structure than cold ones!
– Use a glass, ceramic or metal bowl when whipping your whites – plastic ones tend to hold onto grease from previous uses.
– Wipe your utensils and bowl with vinegar to get rid of any grease that will stop your eggs from whipping up.
– Check your meringue is ready to go by rubbing some between your fingers to check there is no grittiness.
Did you bake this recipe?
Remember to tag @youcanbakeittoo on Instagram & hashtag #youcanbakeittoo
so I can see your wonderful bakes.


Comments
Post a Comment