I'm super excited to be doing a collaboration with my beautiful and talented friend Jaina @cocoaandsilk over on Instagram.
The idea for this collaboration was birthdays, and Jaina's birthday is first up on the 25th of March. We decided that we would make something birthday-related with the main focus on amazing flavours.
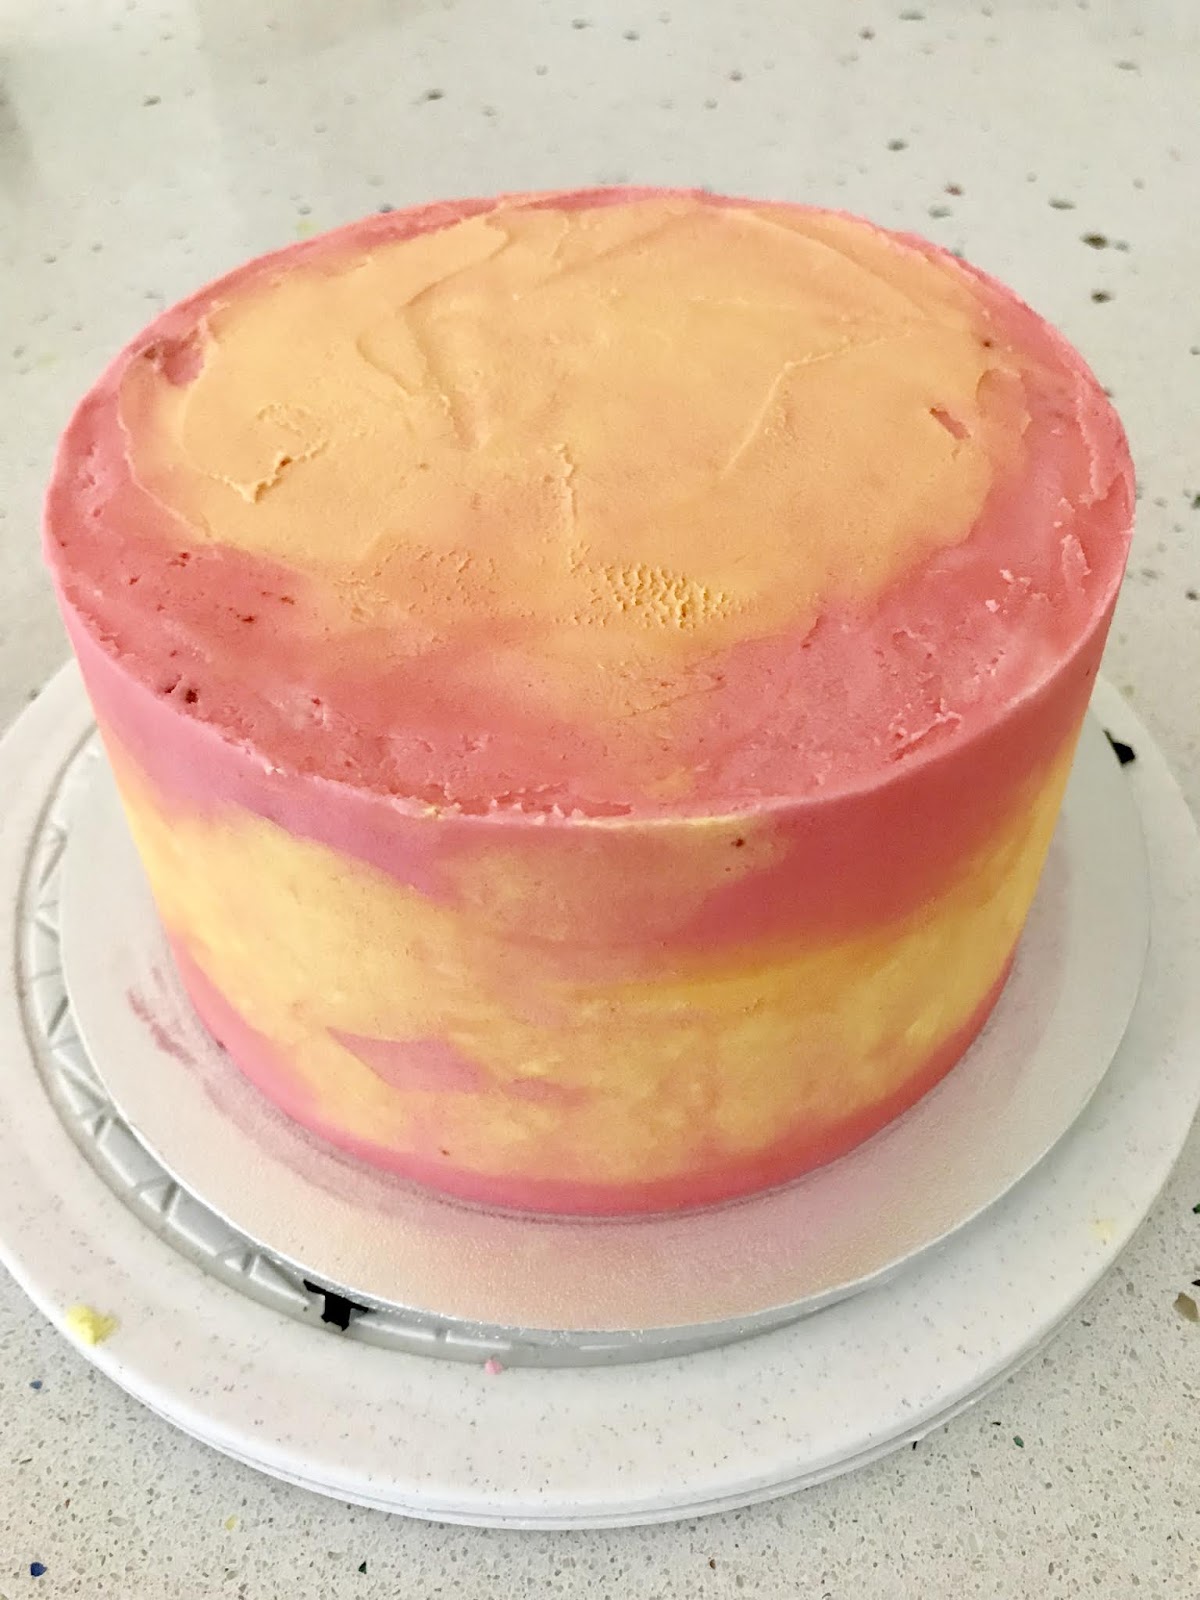
Jaina is a big fan of chocolate, salted caramel, peanut butter, mint chocolate and raspberries. So, I decided to make this Chocolate Raspberry Cake to celebrate her birthday.
This Chocolate Raspberry Cake is super moist with a delicious raspberry compote between the layers and is covered in sweet buttercream. It is also decorated with buttercream and sprinkles to give it the birthday cake feel to it. I also used bright colours as Jaina is a big fan of colourful things.
I would like to thank Jaina for this opportunity as this is the first chocolate-layered birthday cake I have made. Because of the collaboration, it really pushed me to start my cake decorating journey. I really enjoyed making this cake and have learnt quite a few things from it.
It's amazing the time that it takes to make a cake from scratch. Not to mention all the different steps involved.
Hope you get a chance to make this cake too for someone special for their birthday.
Happy Baking xo
Chocolate Raspberry Cake
Ingredients
· 3 cups plain flour
· 2 cups caster sugar
· ½ cup cocoa powder
· 1½ teaspoons baking powder
· 1 tablespoon baking soda
· 1 teaspoon salt
· 2 teaspoons vanilla extract
· 3 eggs
· ½ cup sour cream
· 1 cup buttermilk
· 1½ cups strong coffee
· ¾ cups vegetable oil
Raspberry Compote
· 2 cups raspberries
· 1 cup water
· ½ cup sugar
Buttercream icing
· 175 grams butter, room temperature
· 4½ cups icing sugar
· 4-6 tablespoons milk
· 1½ teaspoons vanilla extract
· Food colouring (watermelon & lemon yellow - americolor)
Chocolate Ganache Drip
· 1 cup dark chocolate
· ½ cup cream
Instructions
1. Preheat oven to 180°C.
2. Spray five round 6-inch tins with oil and dust some flour around the tins.
3. Place all dry ingredients into a large bowl and using an electric mixer, whisk until all ingredients are well combined.
4. Add all wet ingredients, making sure the coffee has cooled down. Mix until combined and turn beater onto medium and continue to mix for a few more minutes.
5. Spoon the mixture into the tins evenly. Make sure to only fill them up a third full and smooth the tops with the back of a spoon or off-set spatula.
6. Bake oven for 30 - 35 minutes or until a skewer inserted in the cakes comes out clean. Remove from oven and cool in pans for 5 minutes before turning onto a wire rack to cool completely.
Raspberry Compote
Bring water to the boil and add raspberries and sugar.
Allow it to boil until reaching the desired thickness (25-35 minutes). If it’s too runny, cornflour and water can be add to thicken it up.
Allow the compote to cool before adding to the cake.
Buttercream icing
Place butter into a large bowl. Beat on low speed until butter is fluffy. Add 1 cup of icing sugar, 2 tablespoons of milk and vanilla essence. Beat until combined and add the remaining 3½ cups of icing sugar.
Increase speed to medium and beat until light and fluffy (this will take a few minutes). Add more milk if the buttercream seems too stiff.
Frosting is now ready for use.
Chocolate ganache drip
Warm the cream by heating it in the microwave at 20 second intervals and then pour over chocolate and allow it to sit for 2 minutes.
Stir until all combined. Allow it to cool down to the desire drip consistency.
Assembling the cake
* Please note - only three cakes were used to make this cake.
Cut off the tops of the three cakes if needed to make them even.
Place one cake onto the cake board, securing it with a bit of buttercream at the bottom.
Pipe a ring of buttercream around the top of the cake and place some raspberry compote in the centre, stack the next cake and do the same.
Lightly crumb coat the whole cake and place into the fridge for 15-20 minutes.
Colour the buttercream in desired colours and create the finally coat on the cake and place cake in the fridge for at least 30 minutes.
Remove cake from the fridge and add sprinkles to the side of the cake and apply the chocolate ganache to create drips (make sure to do drip test first to see how the ganache travels down the cake)
Pipe a border to the top of the cake and add sprinkles.
Tips
· Batter makes 5 x 6-inch round baking tins (weighing about approx. 410 grams batter in each tin)
· Or you can bake 3 x 8-inch cakes.
· Remember to rotate the tins halfway through for a more even bake.
· Allow cakes to cool completely before icing and decorating.
Did you bake this recipe?
Remember to tag @youcanbakeittoo on Instagram & hashtag #youcanbakeittoo
so I can see your wonderful bakes.


This cake came out amazing! You are seriously SO talented 😍
ReplyDeleteAwww...thank you so much for your kind words Inyda 😘😘😘 I really have to thank Jaina for the collaboration as it pushed me out of my comfort zone to finally make a three layered cake 🎂🎂🎂 I had lots of fun making it & learnt lots for the next cake 😬😬😬
Delete